Popular:

  1. Home  > 
  2. Blog   >  
  3. Inches to Pixels

Understanding the measurements of inches to pixels is important to know when dealing with images. An inch is a common unit of measurement both on and offline. But when you’re resizing images on the web, you’ll need to know how to convert inches to pixels.


You want to understand what's JPEG and PNG, you will understand details between this two things.


Converting inches to pixels properly is important when resizing. If you do it right, your image will come out with the highest possible quality.

How Do Inches Convert Into Pixels?

To convert inches into pixels, you need to multiply inches by resolution. Your resolution is measured by DPI. Your DPI will be multiplied by the dimensions in inches.


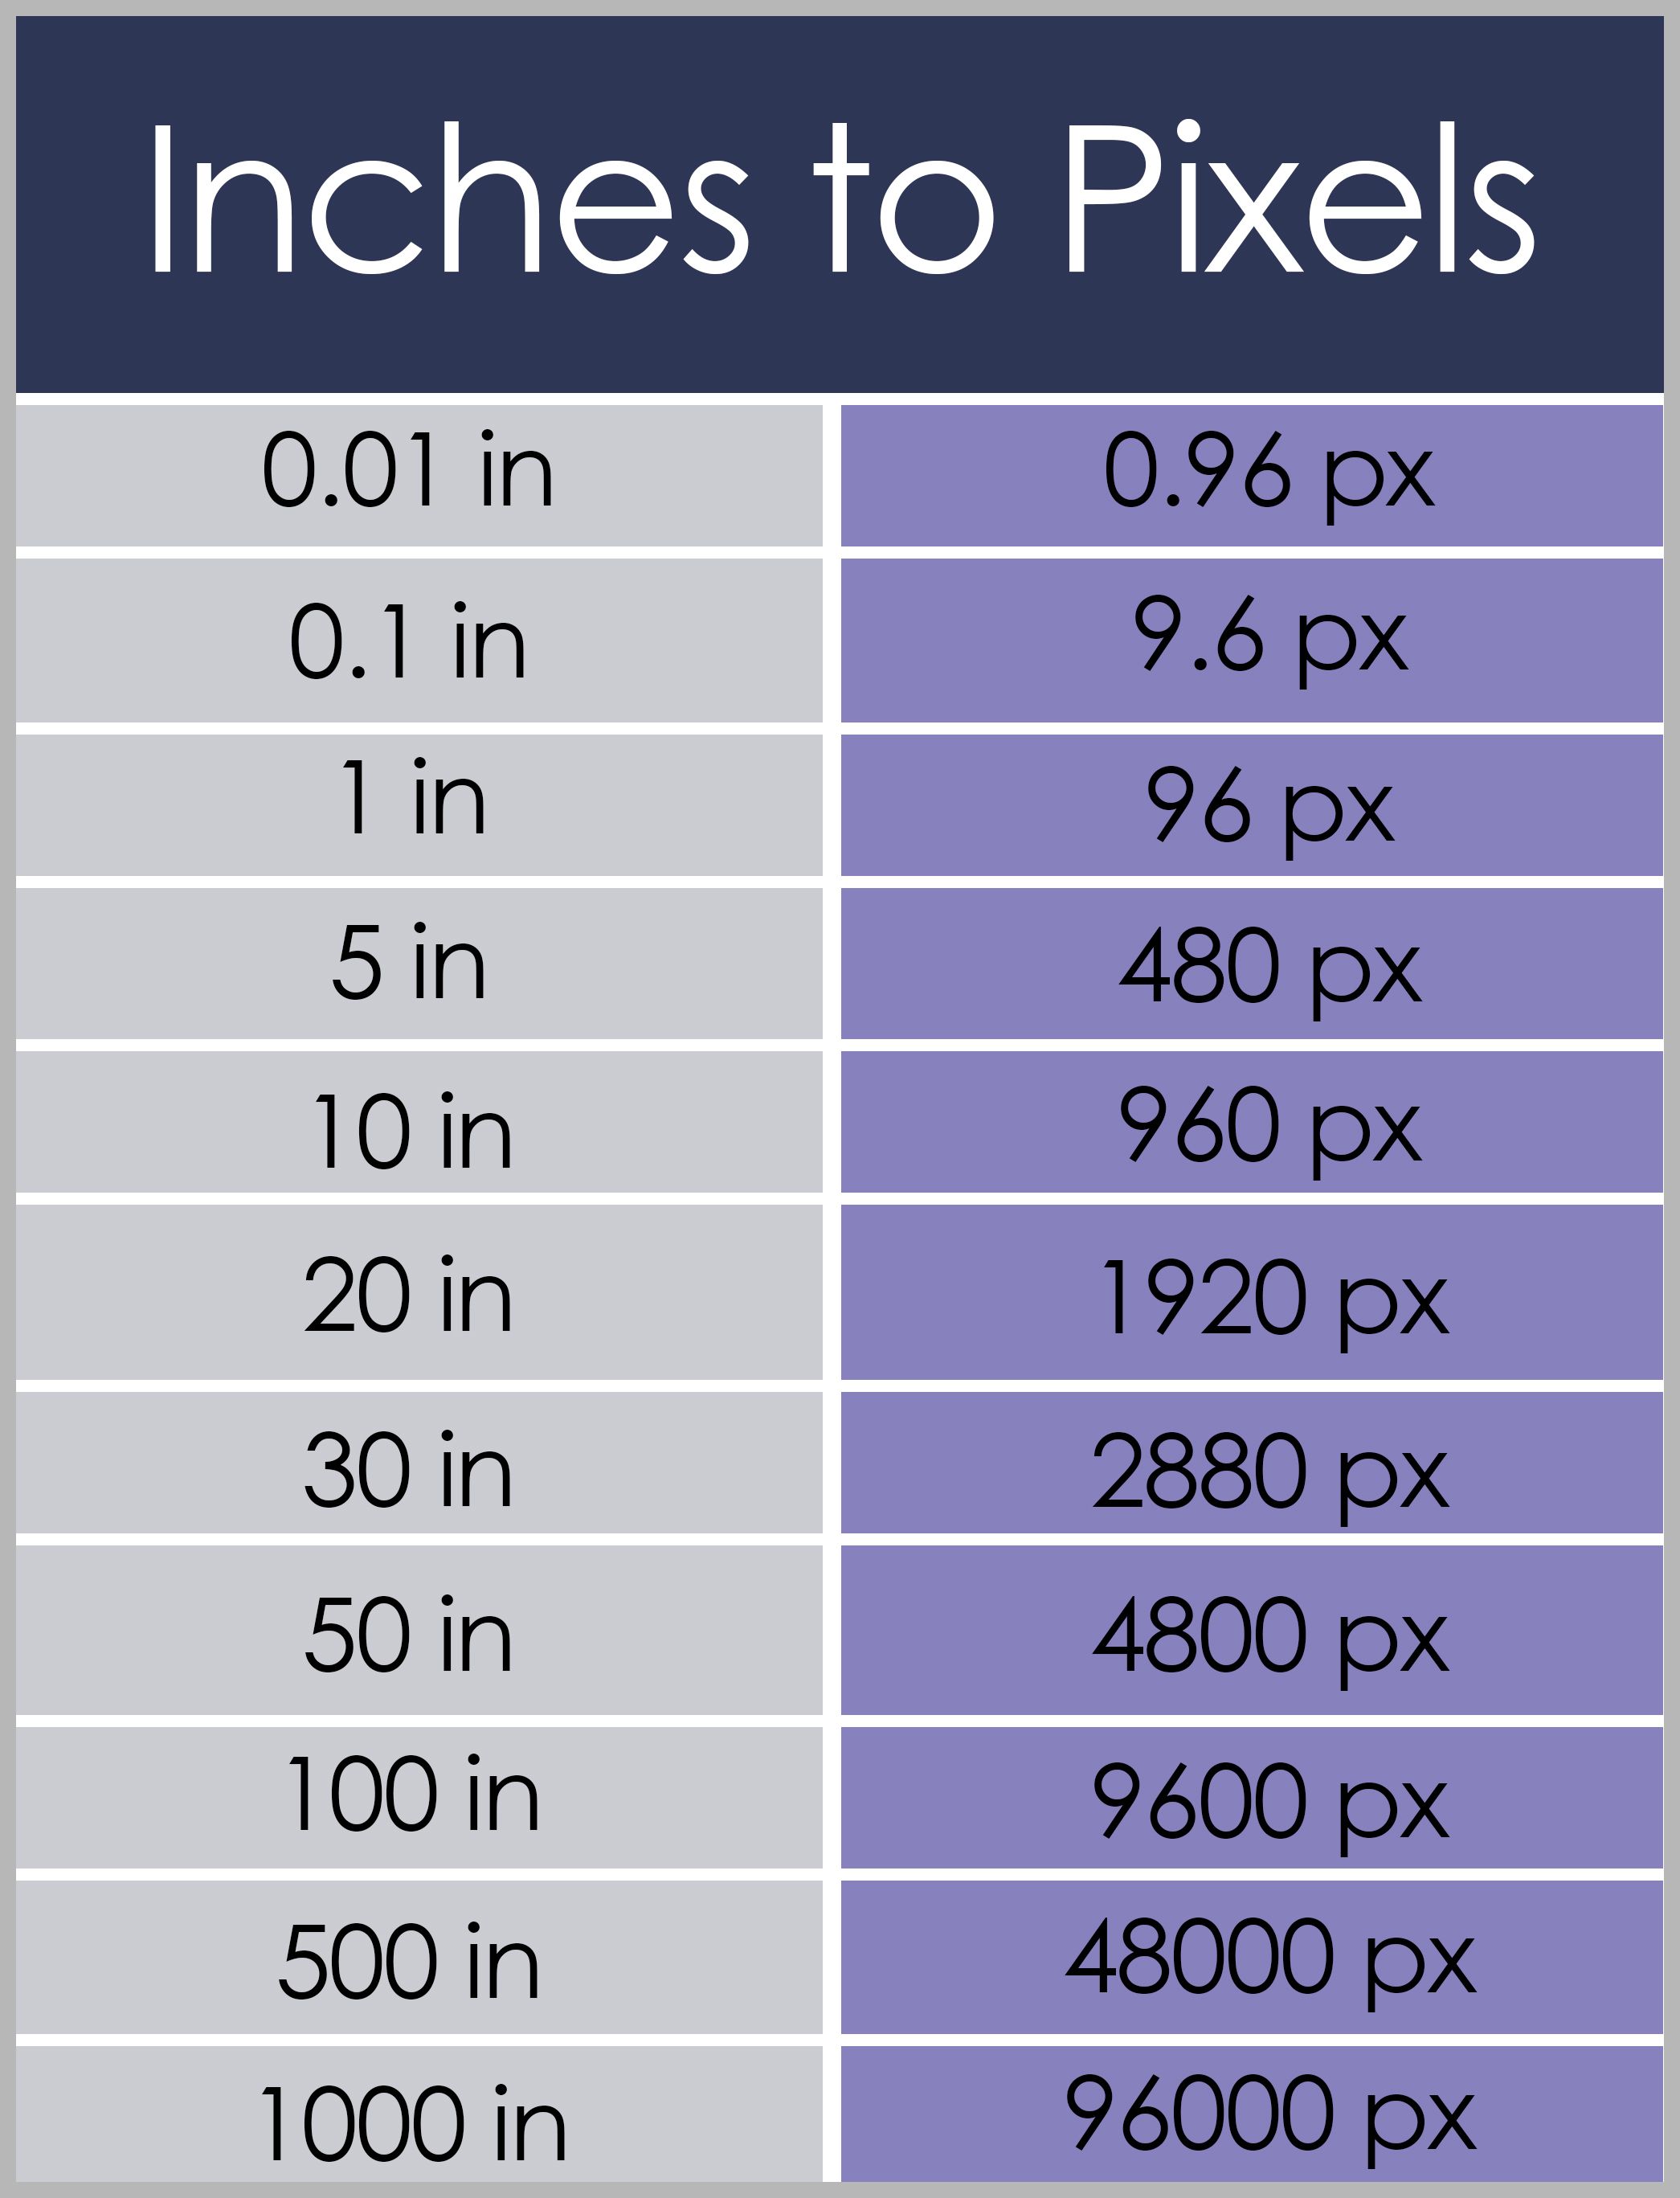
For a quick reference and example, check out this chart:


Table showing the conversion of inches to pixels - Why do you need to understand the conversion of inches to pixels when resizing images, and what free online tools can help you make it easy - Image

A standard photo sizes is 1920 x 1080, it correspond to 1920 pixels. For example, in the stock of photos in PikWizard we put photos in this size because most of the people search this size.


This size is the most adapted one to take great pictures. If you want to be ready about all options, you should read this guide for image copyright, an important step to protect his work.

Why Resizing Properly Matters

Resizing an object with an ideal conversion will not lead to noticeable changes in quality. However, certain changes will lead to predictably bad results, if done improperly.


When an image is enlarged, the image’s editor must create and add new pixel information. This will normally result in one of two changes.


First, the object may become highly pixelated, making an image very difficult to see. The larger pixels that are created will reduce the visible detail of the image substantially. Second, the image may become blurry, which is less unattractive, but still far from ideal.


Downsizing an image is much easier than enlarging one. If you need to downsize an image while maintaining professional quality, make sure you capture it in the highest resolution possible.

Understanding Resolution: What Is DPI?

The term “dots per inch” (DPI) is interchangeable with “Pixels per inch”. These two terms are interchangeable and refer to the resolution of an image. Your image’s DPI is the exact number of printed dots that would appear within one inch of an image when it’s printed.


Remember, a higher resolution doesn’t necessarily mean a larger size. Larger images often naturally have a higher resolution because higher resolution images are typically larger.

How to Find Your DPI

Finding your image’s DPI is easy. The method you use will depend on your computer’s OS.


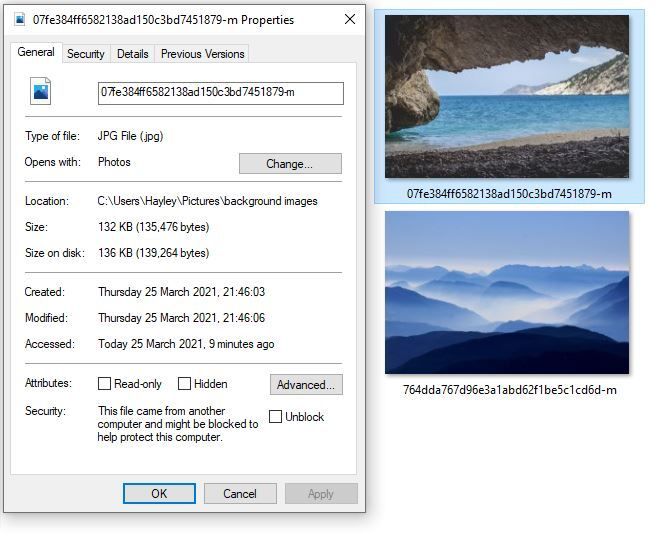
  • Right-click on the file name and select “Properties”.


Properties pop up of right clicking image - Why do you need to understand the conversion of inches to pixels when resizing images, and what free online tools can help you make it easy - Image

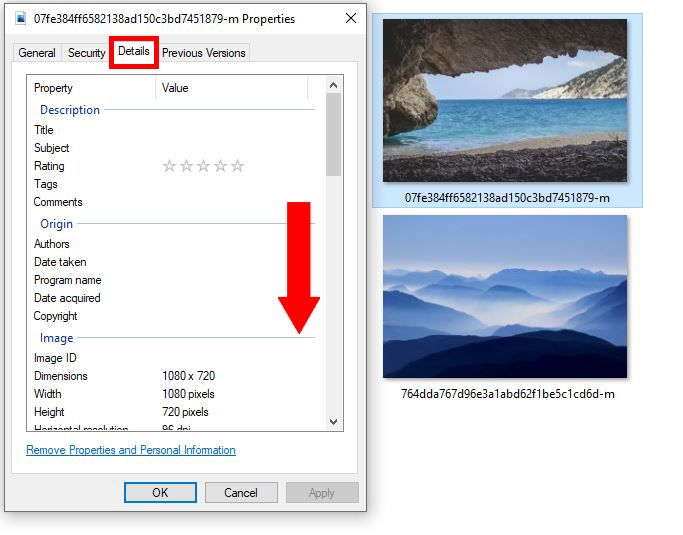
  • Select “Details”.


Details pop up of image with red arrow showing to scroll down - Why do you need to understand the conversion of inches to pixels when resizing images, and what free online tools can help you make it easy - Image

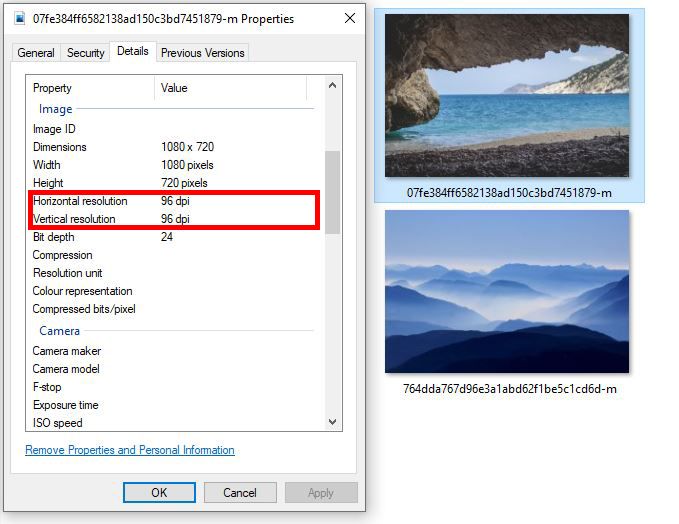
  • Look at the “Image” section, where it will be labeled “Horizontal Resolution” and “Vertical Resolution”.


DPI of image showen in detials panel - Why do you need to understand the conversion of inches to pixels when resizing images, and what free online tools can help with it - Image

DPI vs PPI

DPI and PPI are often used almost interchangeably. But there are a few differences that separate the two.


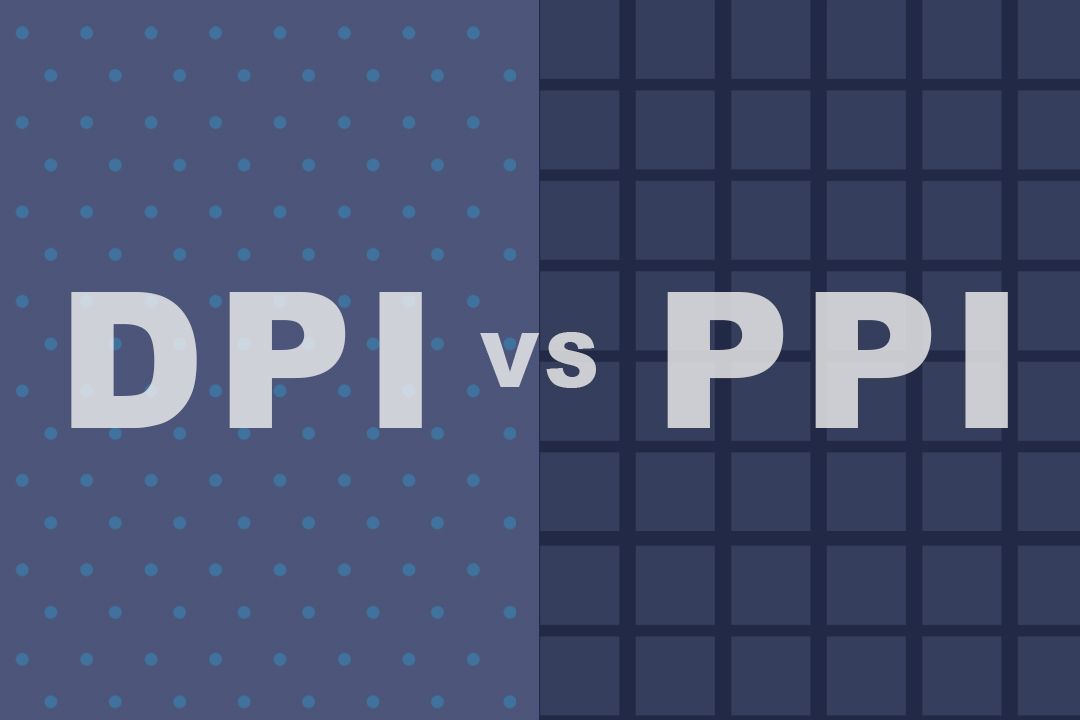
DPI VS PPI image showing dots and pixels - Why do you need to understand the conversion of inches to pixels when resizing images, and what free online tools can help with it - Image

  • DPI refers to the number of printed dots contained within one inch of an image printed by a printer.”


  • PPI refers to the number of pixels contained within one inch of an image displayed on a computer monitor.


Your image’s PPI is the number of pixels in one inch of an image viewed on a computer screen. In general, a higher PPI means a better resolution. Conversely, lower PPIs imply a lower resolution and therefore lower quality.


An image’s PPI contributes to its quality. If a digital image has too few pixels, the picture will carry less detail and appear pixelated. Digital images with more pixels simply have better detail. The amount of PPI is determined by the image size of the photo.


Keep in mind that some professional print services will request images that have a certain DPI before they can be printed. But what they normally mean is PPI, not DPI, so it can be a bit confusing.

Image Quality Indicators

At a glance, you can refer to a few indicators of quality.

File Size

larger files (relative to the image dimensions) will normally hold a higher-quality image.


The file size of an image can change according to where the image was posted. The way you transport the image also affects its size. For example, a photo on your smartphone might be around 2MB. But if you post that image and then it’s downloaded from Facebook, it will end up around 100KB. However, if you took that image and saved it on a USB, it would retain the same 2MB size.

Dimensions

Dimensions alone don’t tell much of a story. However, when compared alongside image resolution or file size, they do.

Resolution

When it comes to image resolution, there are two separate scenarios. When you have an image on your computer, the PPI is important. When you print, DPI is the number you want to look at.

Printing With The Right Image Size

If you want, you can change the DPI of an image. That’s because your DPI is just a measurement of print resolution. It has no impact on the size of a digital image. Even the file size is unchanged by the DPI.


f you’re editing an image you plan to print, setting your target DPI before resizing is a good idea. This will keep the resolution after printing in line with your expectations. It will also keep your image from becoming too small to print at the size you want to print with.


An appropriate DPI is more important when you’re planning to use a printer. The “standard” DPI for an image set for the printer is 300. In some cases, it can be as low as 150, but going lower will have a noticeable impact on its quality.

Digital Image Quality

If you don’t need to print an image, you have less to worry about. The main challenge is maintaining quality when enlarging an image.


Under normal circumstances, a higher PPI will mean a better resolution. Conversely, a lower PPI will mean a worse resolution.


Enlarging an image that looks as good as the original size is difficult. But you don’t need to worry…


Design Wizard has a free conversion tool for resizing images. While you’re resizing your image, you can also experiment with the other design tools. If you also want to change the image’s brightness, contrast, or transparency, you can do so at the same time. Try to kill a few birds with one stone!

Upload Times & Loading Speed

Large images, particularly ones with a high resolution, will be slower to load. If you’re displaying your image on a website, you don’t need to have a super-high DPI.


Your average 15-inch laptop will be able to capably display images of up to 100 DPI. But the image’s DPI doesn't have to be much higher to appear amazing. For a long time, a DPI of 72 was considered ideal for images displayed online.


If you’re downloading an image, the file’s size is the only worthwhile indicator of download time.

Try The Design Wizard Conversion Tool

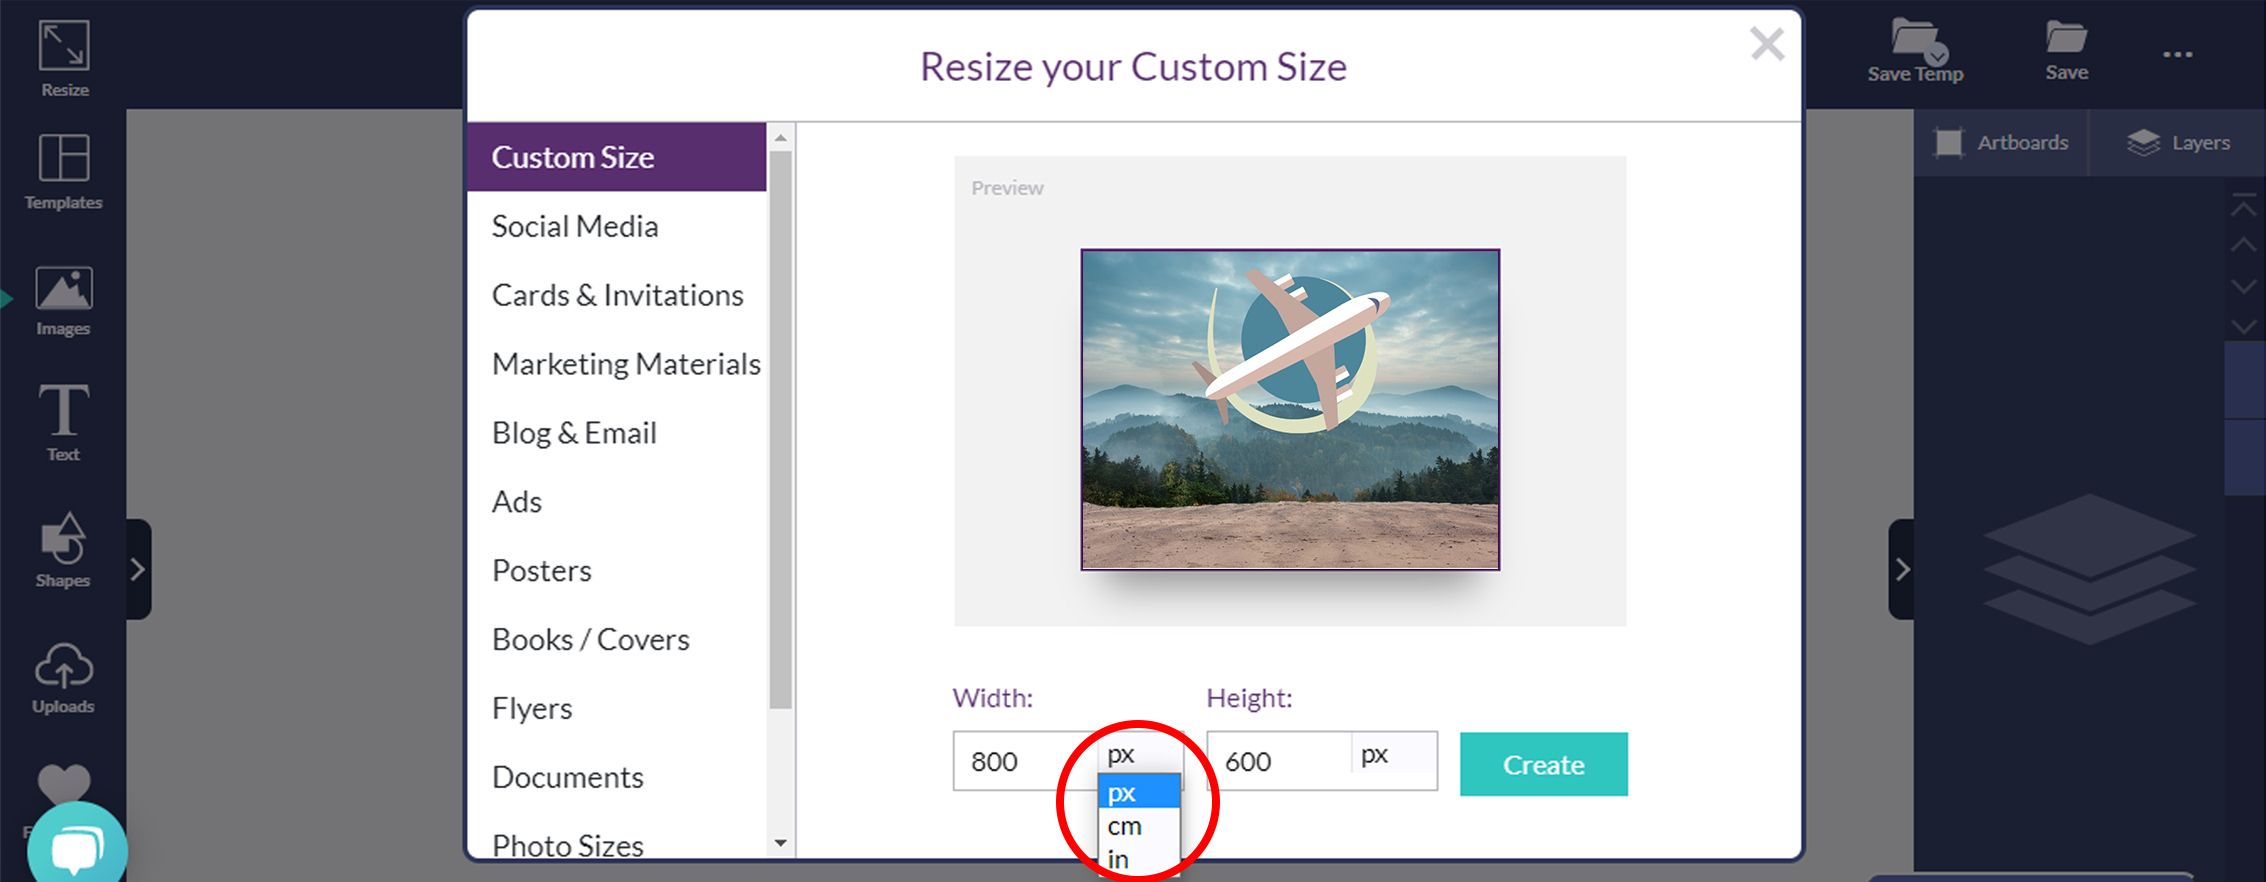
Go ahead and try the Design Wizard conversion tool. It’s free.


Design Wizard resizing tool being used to change dimensions of image - Why do you need to understand the conversion of inches to pixels when resizing images, and what free online tools can help with it - Image

You can resize your image the easy way and ensure it retains its quality. If you need to resize an image for a specific purpose, there are fast ways to do that. Design Wizard has all the standard sizes of social media banners. You can resize:


  • To meet social media image requirements
  • Standard cards and invitations
  • Blog images
  • Email images
  • Online ads
  • Books and covers
  • Flyers
  • Documents
  • Custom sizes


Whether or not you want to use the Design Wizard templates, there are other features you can use. You can crop your images and add layers to them. You can edit grid, blur, and saturation. There are different filters you can play with and you can change the tint. You can also edit the contrast and transparency of your image.


If you need to resize and edit an image, why not kill two birds with one stone. Make all these changes and more on Design Wizard.